Events
An event is the container for a specific festival or sales day. Products, prices, stations, orders, and reports always relate to an event. Before you create products or accept orders, you therefore need to create an event and activate it first.
You can find this section via Events in the sidebar.
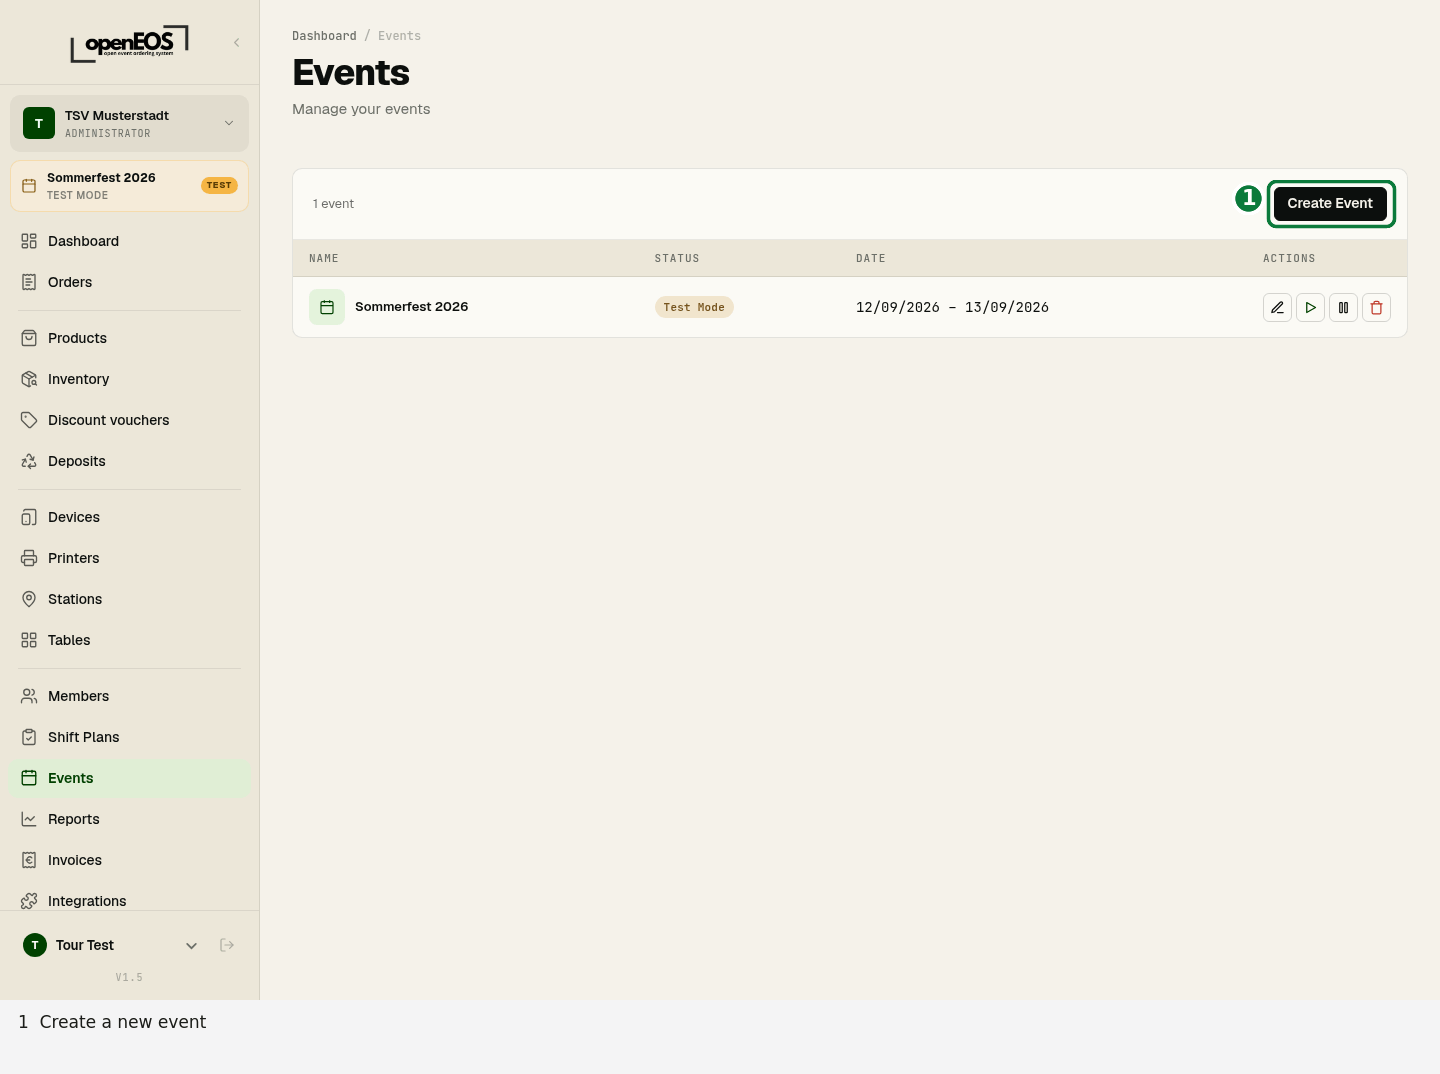
Creating an event
- Click Create Event.
- Fill in the form:
- Name (required) — e.g. "Sommerfest 2026"
- Description — optional additional text
- Start date and End date — without an end date the event lasts one day
- Checkout mode — pay immediately or run a tab, see below
- Tables — whether and how the tills ask for a table, see below
- Enable online shop — lets guests order items from this event online, with opening hours and an optional service fee
- Click Create.
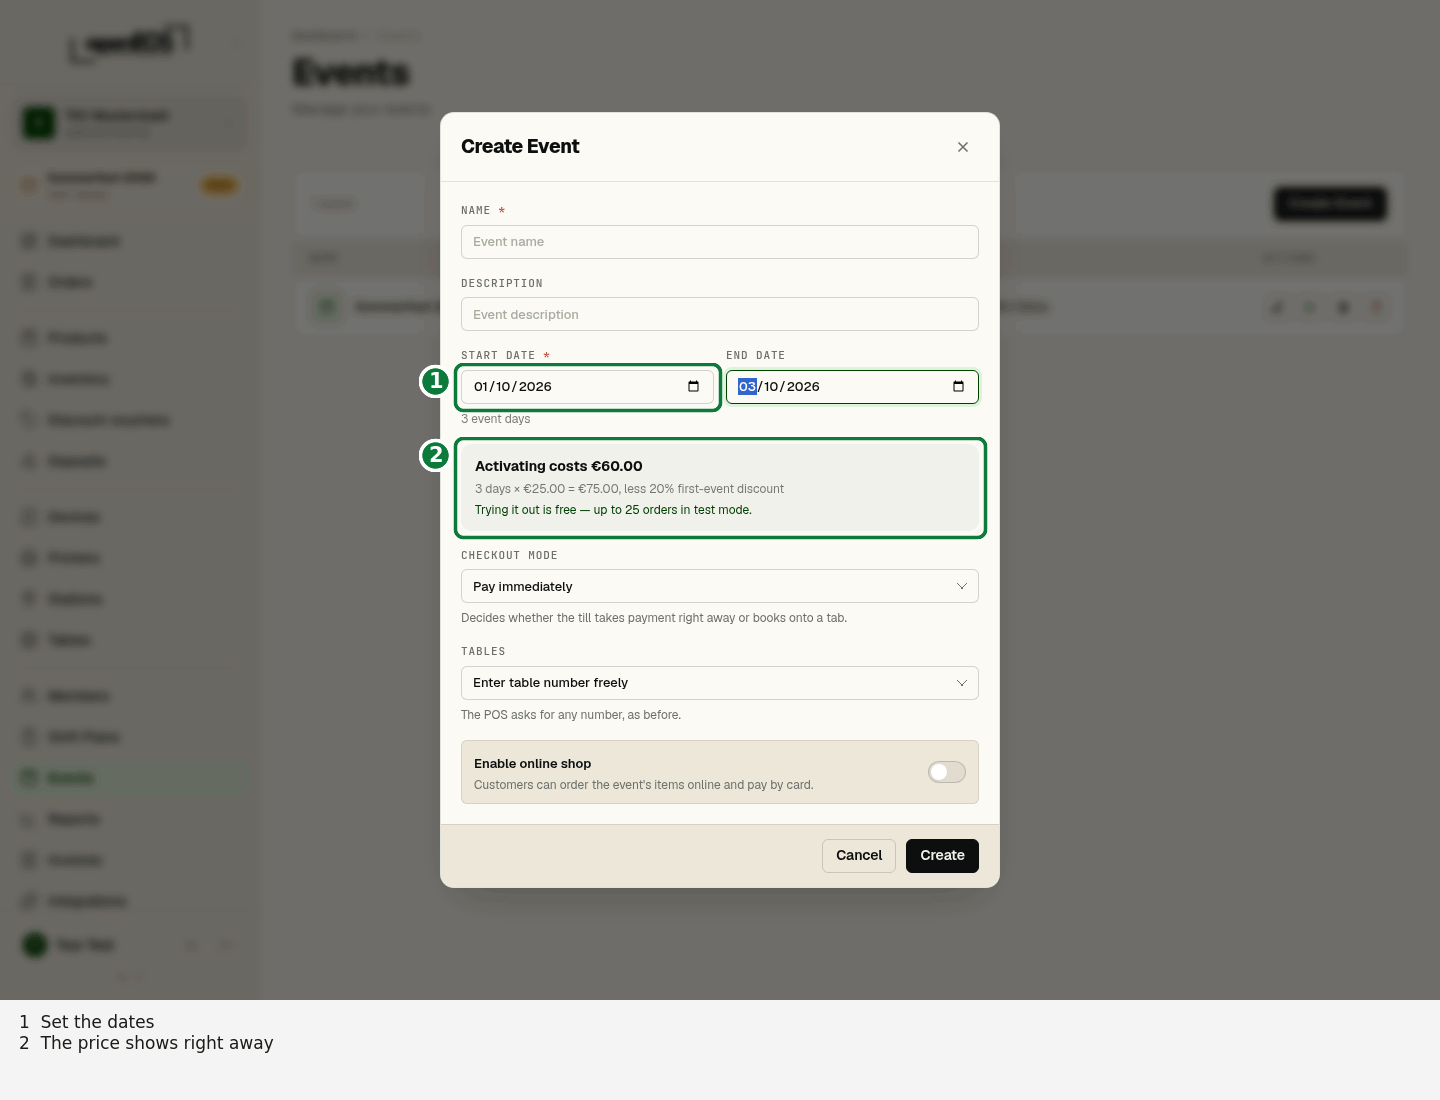
You can change everything later via Edit. If you change the checkout mode or tables while the event is running, the tills pick up the new setting by themselves.
Checkout mode
The checkout mode decides when guests pay at the till:
| Checkout mode | For | At the till |
|---|---|---|
| Pay immediately | Bars, food stalls, drinks counters — the guest pays when ordering | Only Check out: order and payment in one go |
| Run a tab | Table service — guests pay at the end | Send passes rounds to the kitchen and bar, Check out settles everything open at the table at the end |
The details are under Till.
Tables
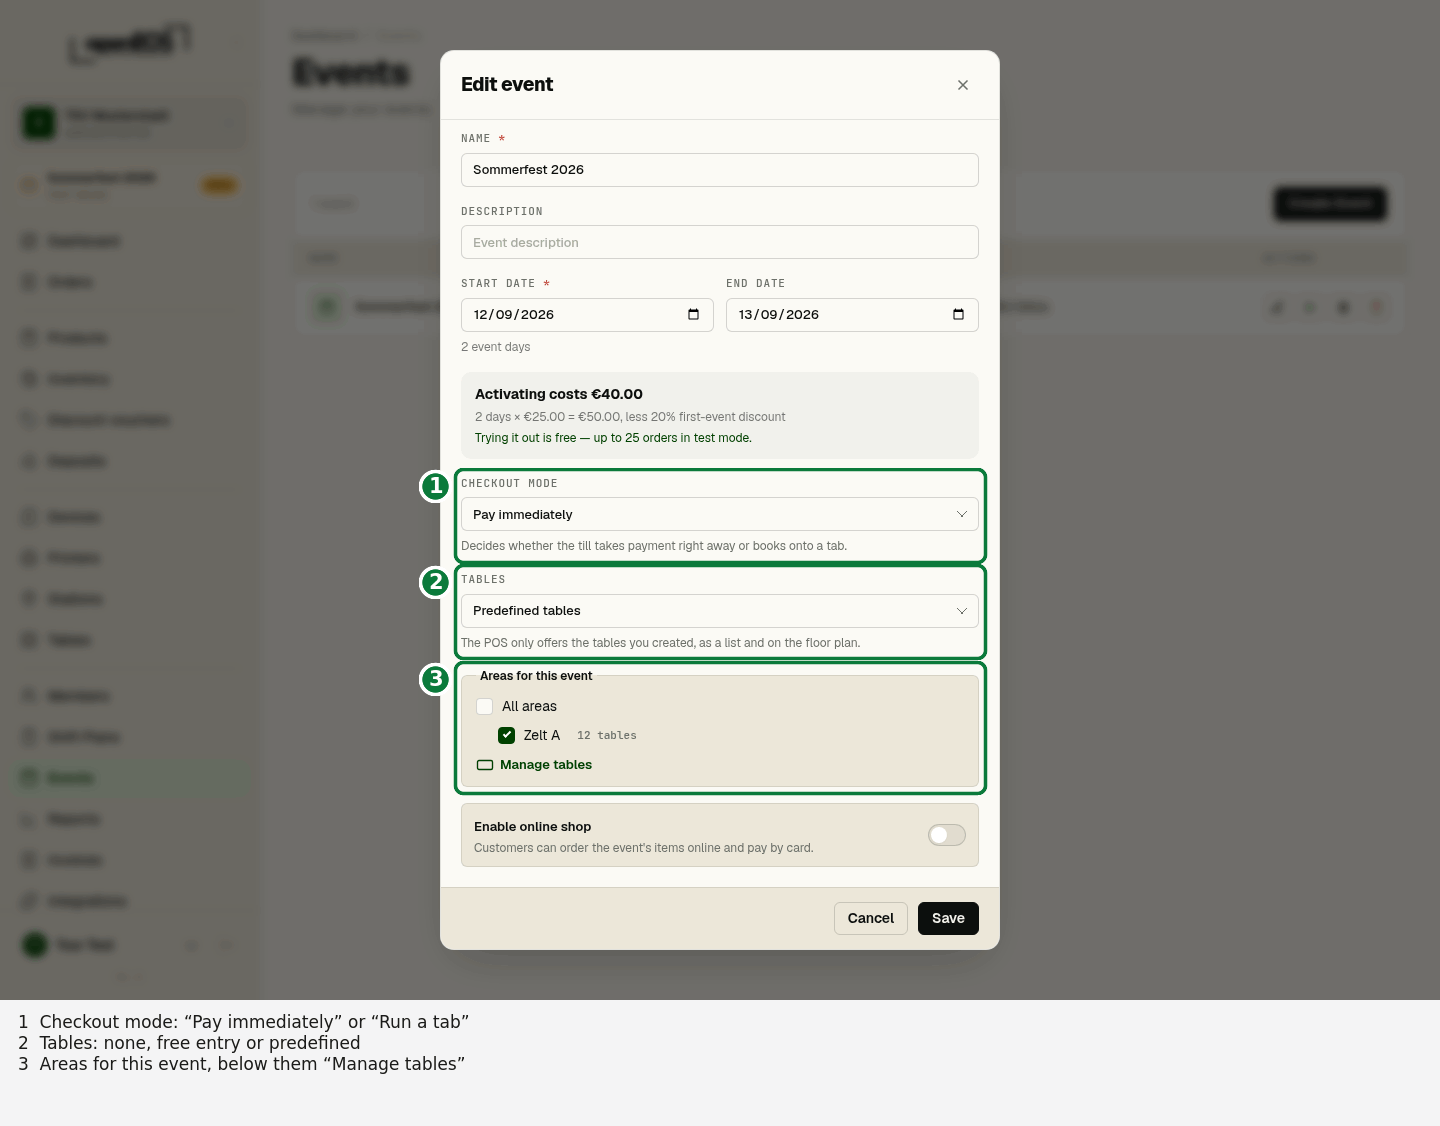
Under Tables you decide whether the tills ask for a table:
| Setting | At the till |
|---|---|
| No tables (counter service) | All tills book at the counter without asking for a table. |
| Enter table number freely | The till asks for any number. No tables need to exist. This is the default. |
| Predefined tables | The till only offers the tables you created — by number, as a list and on the floor plan. |
With Predefined tables you also choose the Areas for this event — only Tent A, say, if the beer garden stays closed this year. All areas also includes areas created later. You maintain the areas and tables themselves under Tables — the Manage tables link in the dialog takes you there. If no tables exist yet, the dialog points this out; the tills can then only book without a table.
Whether a till asks for a table at all also depends on the device: tills in Counter service mode always book at the counter, whatever is set here. See Devices.
What an event costs
OpenEOS is billed per event day — not per order, and not as a subscription. The amount appears right under the date range as you create it:
Activating costs €60.00 3 days × €25.00 = €75.00, less 20% first-event discount Trying it out is free — up to 25 orders in test mode.
Change the dates and the amount follows.
Test first, pay later
A new event starts in test mode. Everything works in it — tills, screens, printers, reporting — capped at 25 orders. That way you can run the whole thing before any money changes hands.
Activating deletes the test orders. Your setup stays: products, categories, prices, stations, devices and printers do not have to be entered again.
Set everything up calmly beforehand and play one round through in test mode: take an order at the till, acknowledge it on the kitchen screen, print a ticket. Then you know on the day that the chain holds.
Paying
Activation is paid by card or direct debit. The invoice arrives by email automatically and is also available under Invoices.
Activating an event
Newly created events are initially inactive. In the table you will find action buttons per row for editing, activating, managing, and deleting an event.
Activate the desired event — it then appears with the status Active and is displayed as the active event in the top left of the sidebar. Only after activation can you maintain products and record orders.
The active event controls which products appear at the till and which event orders are assigned to. When you switch the active event, the context in products, stations, and stock management switches with it.
Status & date
In the overview you can see the name, status (Active/Inactive), and date range for each event. This keeps you on top of things even when running multiple events.