Shift Plans
With Shift Plans you organize the volunteers for your event. You create jobs (e.g. bar, grill, setup/teardown), generate shifts from them, and publish a public volunteer link that lets helpers sign themselves up for open slots.
You'll find this section under Shift Plans in the sidebar.
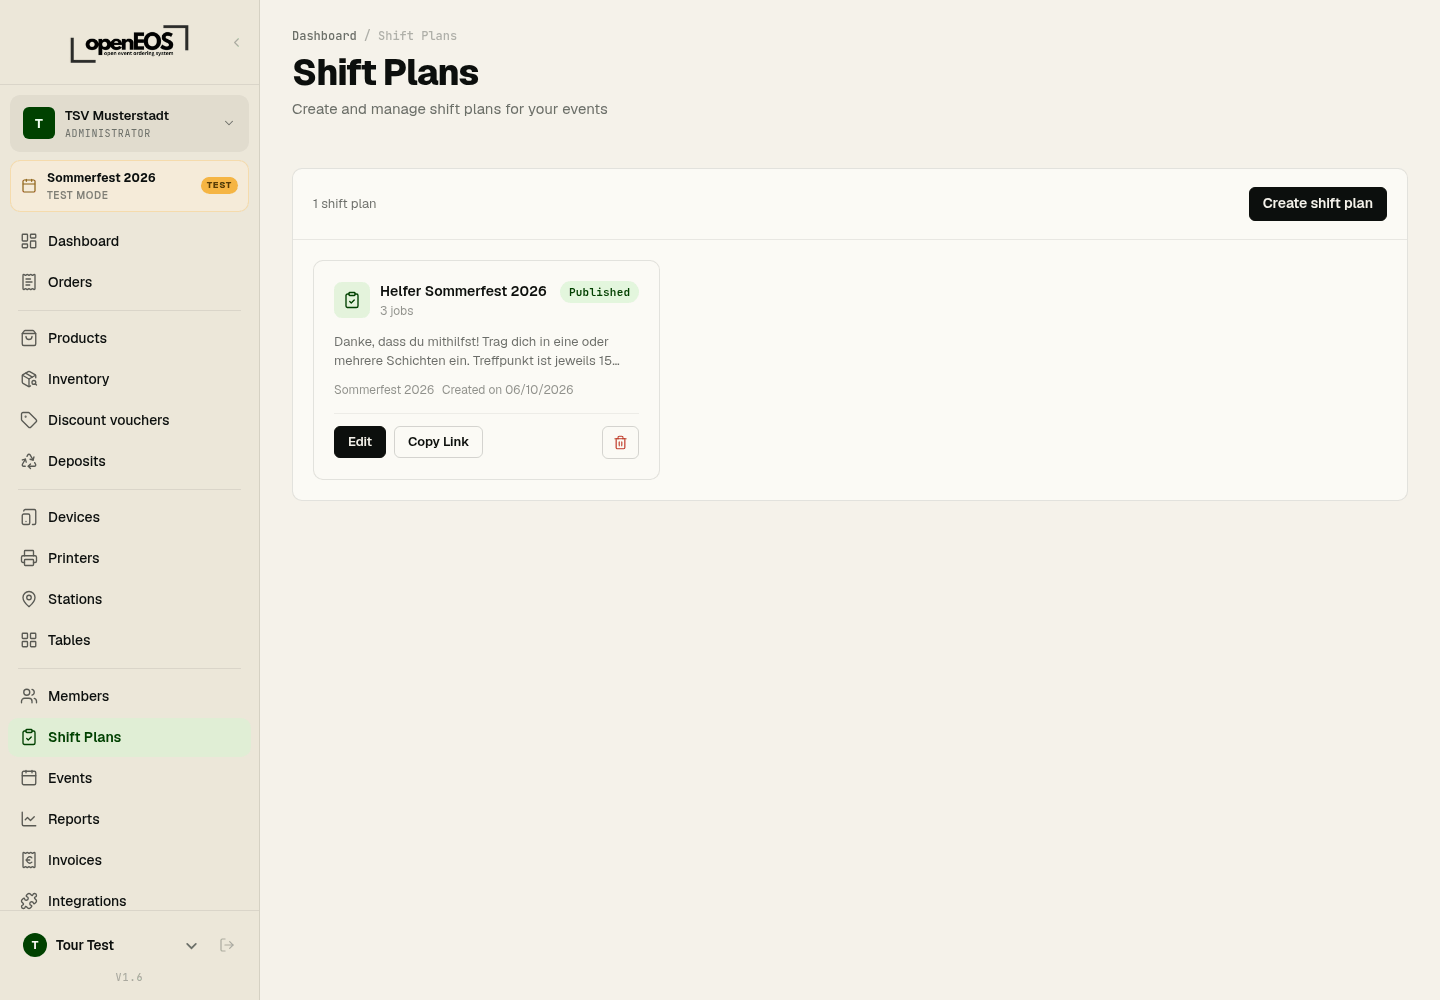
1. Create a shift plan
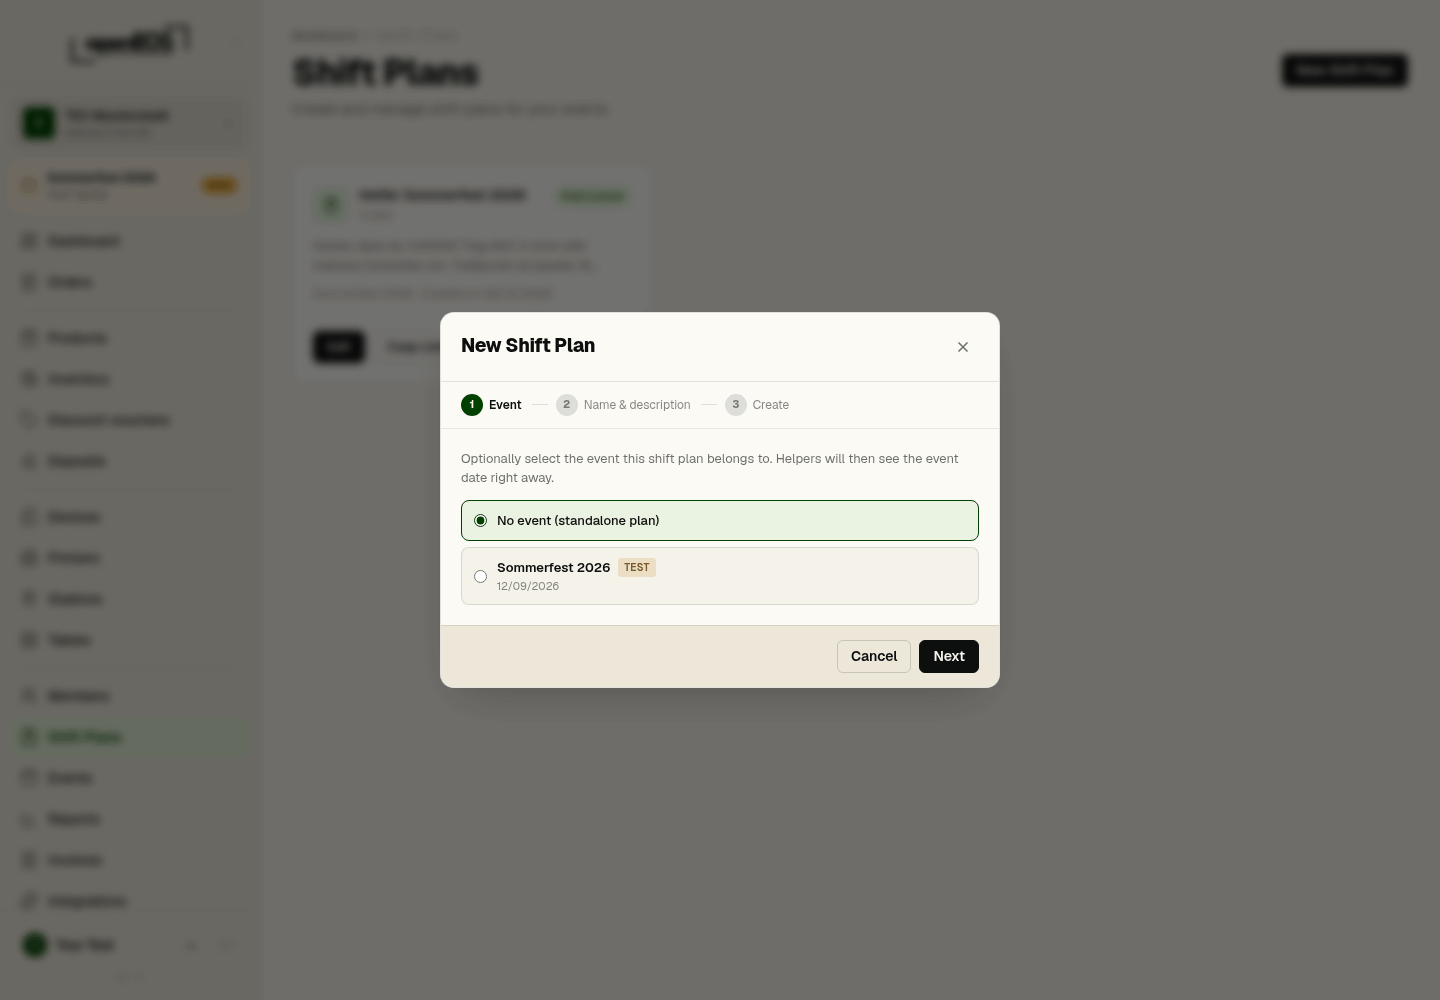
Click Create shift plan (at the top of the list of shift plans). A dialog walks you through three steps:
- Event – Optionally select the event this plan belongs to. Helpers then see the event date right away. You can also choose No event (standalone plan).
- Name & description – "Helper schedule" with the event name is suggested. The description appears later on the public volunteer page.
- Create – review your input and create the plan. It starts with the status Draft.
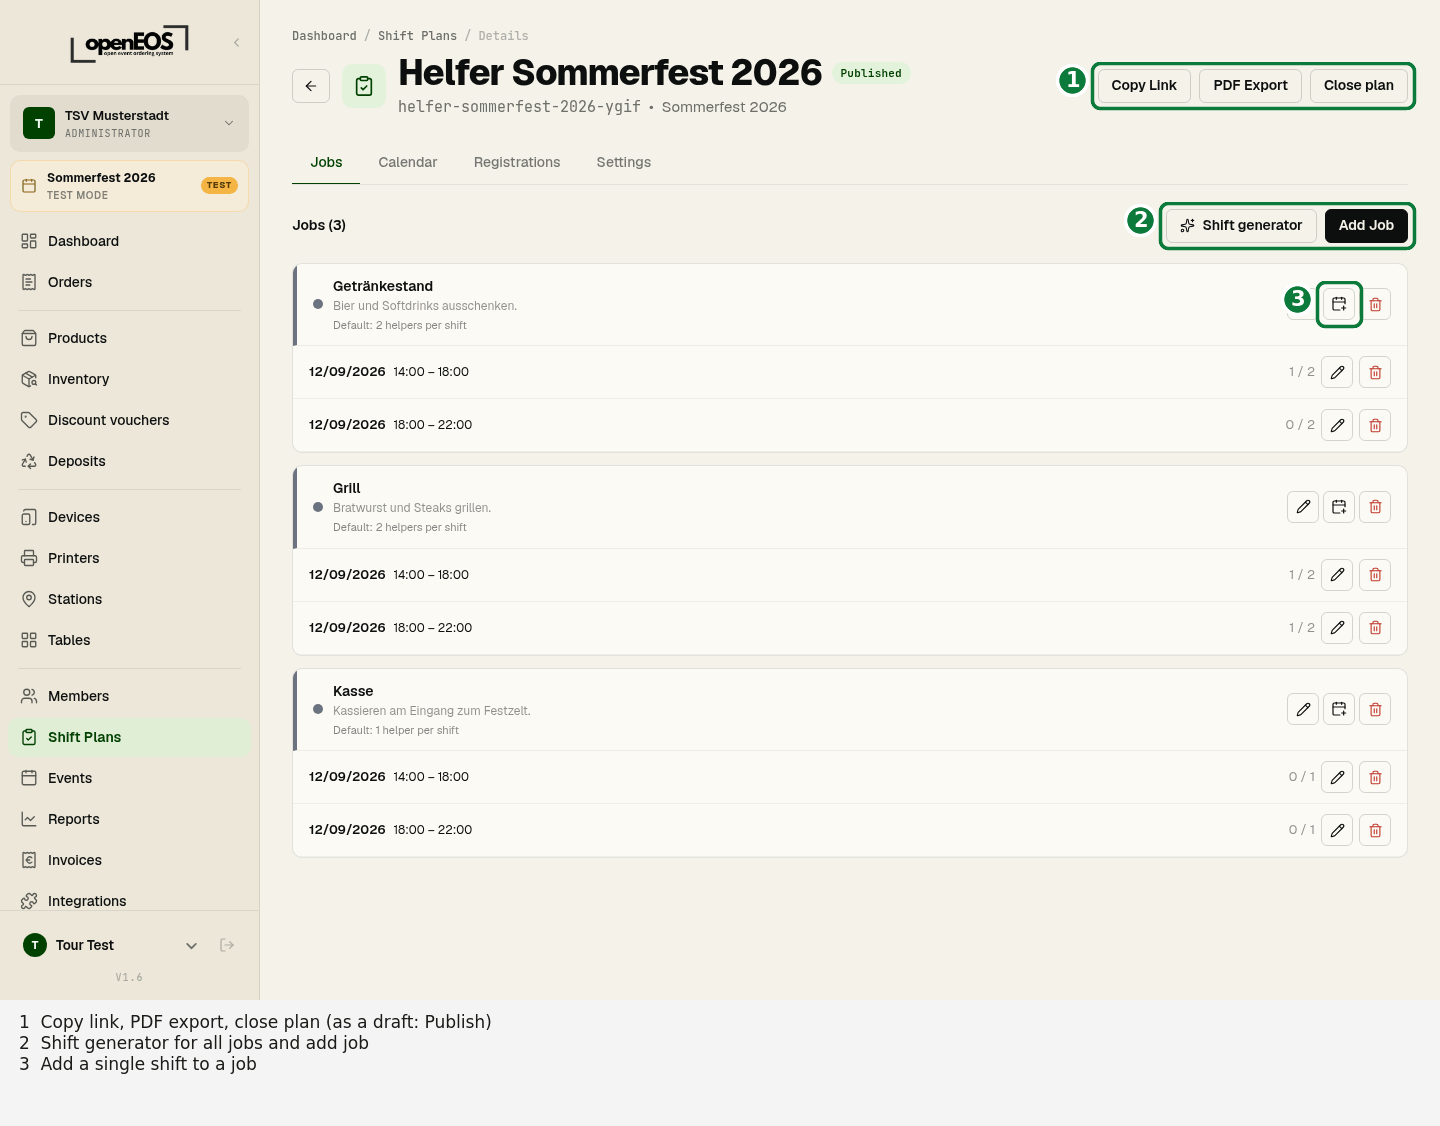
The top of the page shows the plan's name, status and event, with the back button on the left. The actions sit on the right as labelled buttons: while it is a draft PDF Export and Publish, once published Copy Link, PDF Export and Close plan. Below, the plan has four tabs: Jobs, Calendar, Registrations and Settings.
2. Add jobs
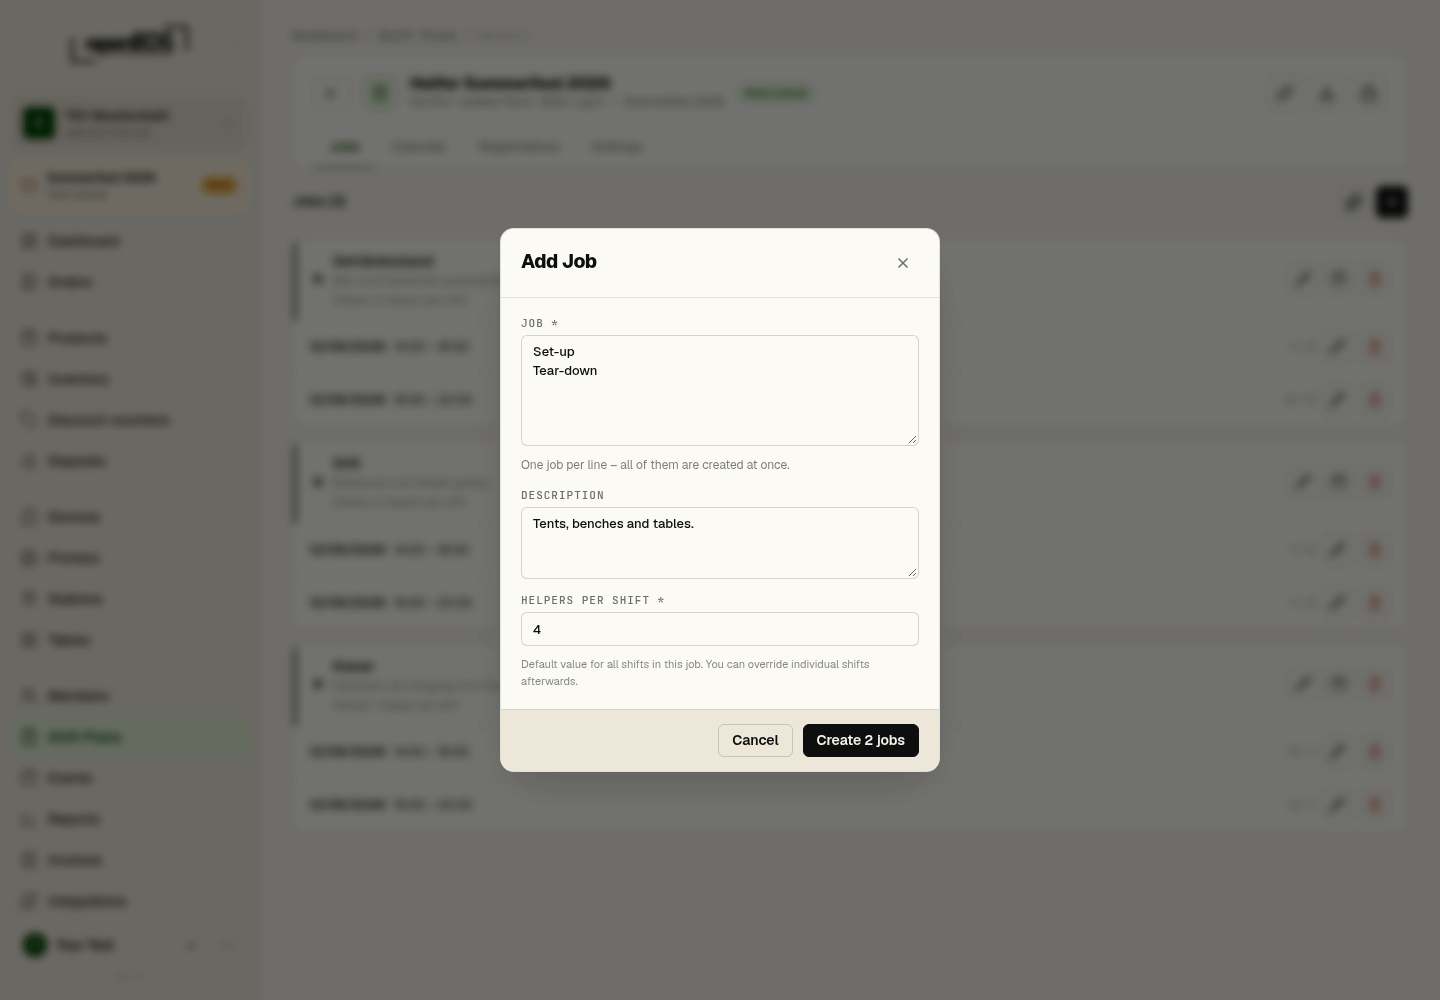
A job is a task or station that needs helpers. In the Jobs tab, click Add Job:
- Job – one job per line (e.g.
Set-up,Tear-down); all of them are created at once. - Description – optional public description for helpers.
- Helpers per shift – default for all shifts of this job (can be overridden per shift).
The jobs are then listed one below the other, each with its shifts and how full they are (e.g. 1 / 2). The pencil edits a job, the calendar icon adds a single shift to it.
3. Generate shifts
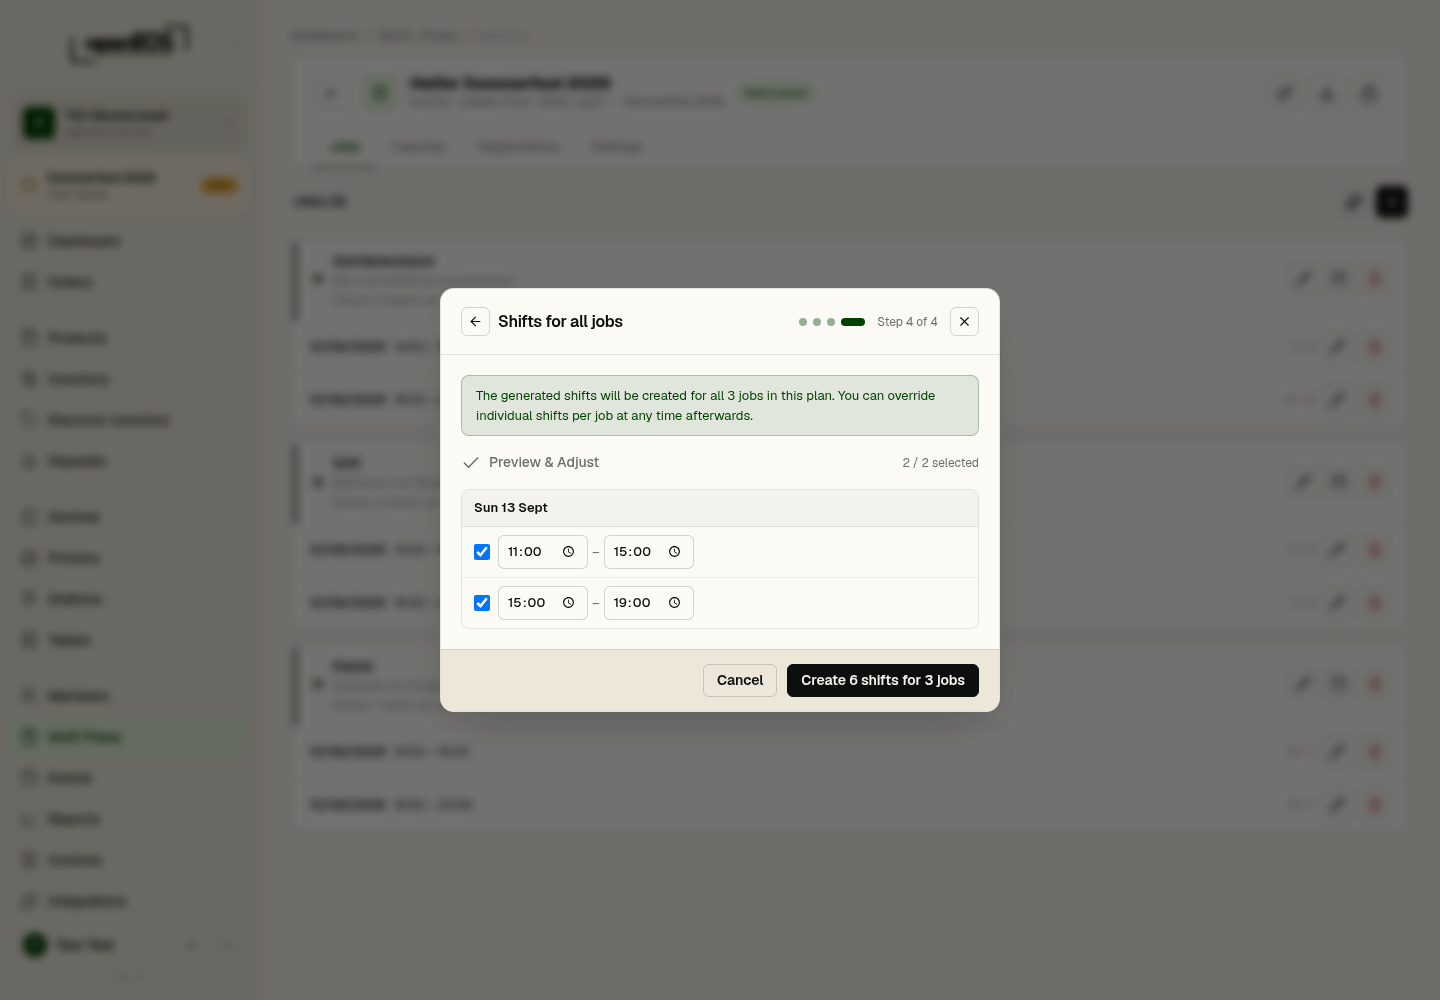
You can create shifts (time slots) for each job individually via the calendar icon — or for all jobs at once with the Shift generator (next to Add Job). It has four steps:
- Select Dates – start and end date (pre-filled if an event is linked).
- Set Time Window – start and end of the daily operating hours, optionally with Times per day. If a shift ends before it starts, it runs past midnight.
- Configure Shifts – Shifts per Day (e.g. 2 ≈ 4 hours per shift) and an optional Shift Overlap for handover.
- Preview & Adjust – all generated shifts per day. Untick individual shifts or change their times before applying them with "Create X shifts for Y jobs".
The Calendar tab then shows all jobs and days as an overview, with how full each shift is and the names of the helpers signed up.
4. Settings & public link
The Settings tab contains:
- General – name and description, as helpers see them on the public page.
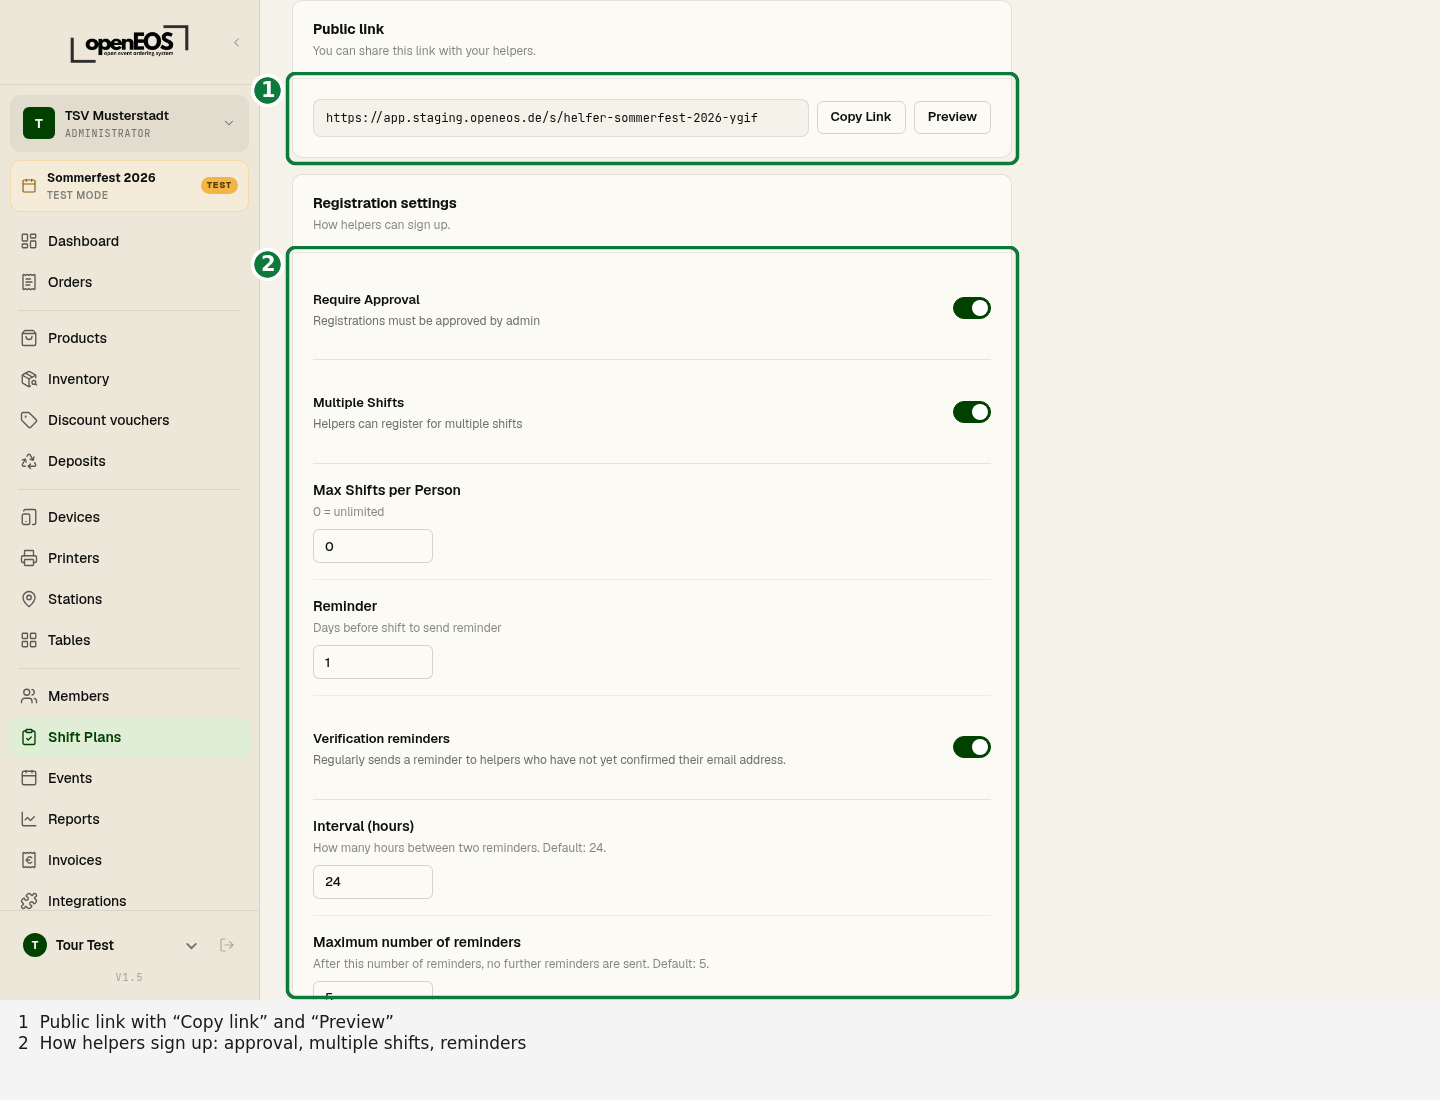
- Public link –
https://app.openeos.de/s/<plan>. Use Copy Link to share it with helpers and Preview to open the public page. - Registration settings:
- Require Approval – registrations must be approved by you.
- Multiple Shifts – helpers may sign up for more than one shift.
- Max Shifts per Person – upper limit (0 = unlimited).
- Reminder – how many days before the shift a reminder goes out.
- Verification reminders – remind helpers who have not confirmed their email yet; with Interval (hours) and Maximum number of reminders.
5. Publish
While the plan has the status Draft, it is only visible internally. Click Publish at the top right to release it — the status changes to Published and the public link becomes active. Later, Close plan stops accepting registrations.
Publish only once jobs and shifts are in place. You can still make changes afterwards at any time.
The public volunteer page
Via the public link, helpers reach a clear page without logging in, showing your organization's name, the dates, your description and all shifts. For each time slot they see, per job, how many places are still free (e.g. "2 /2 free"). They can switch between Cards and List.
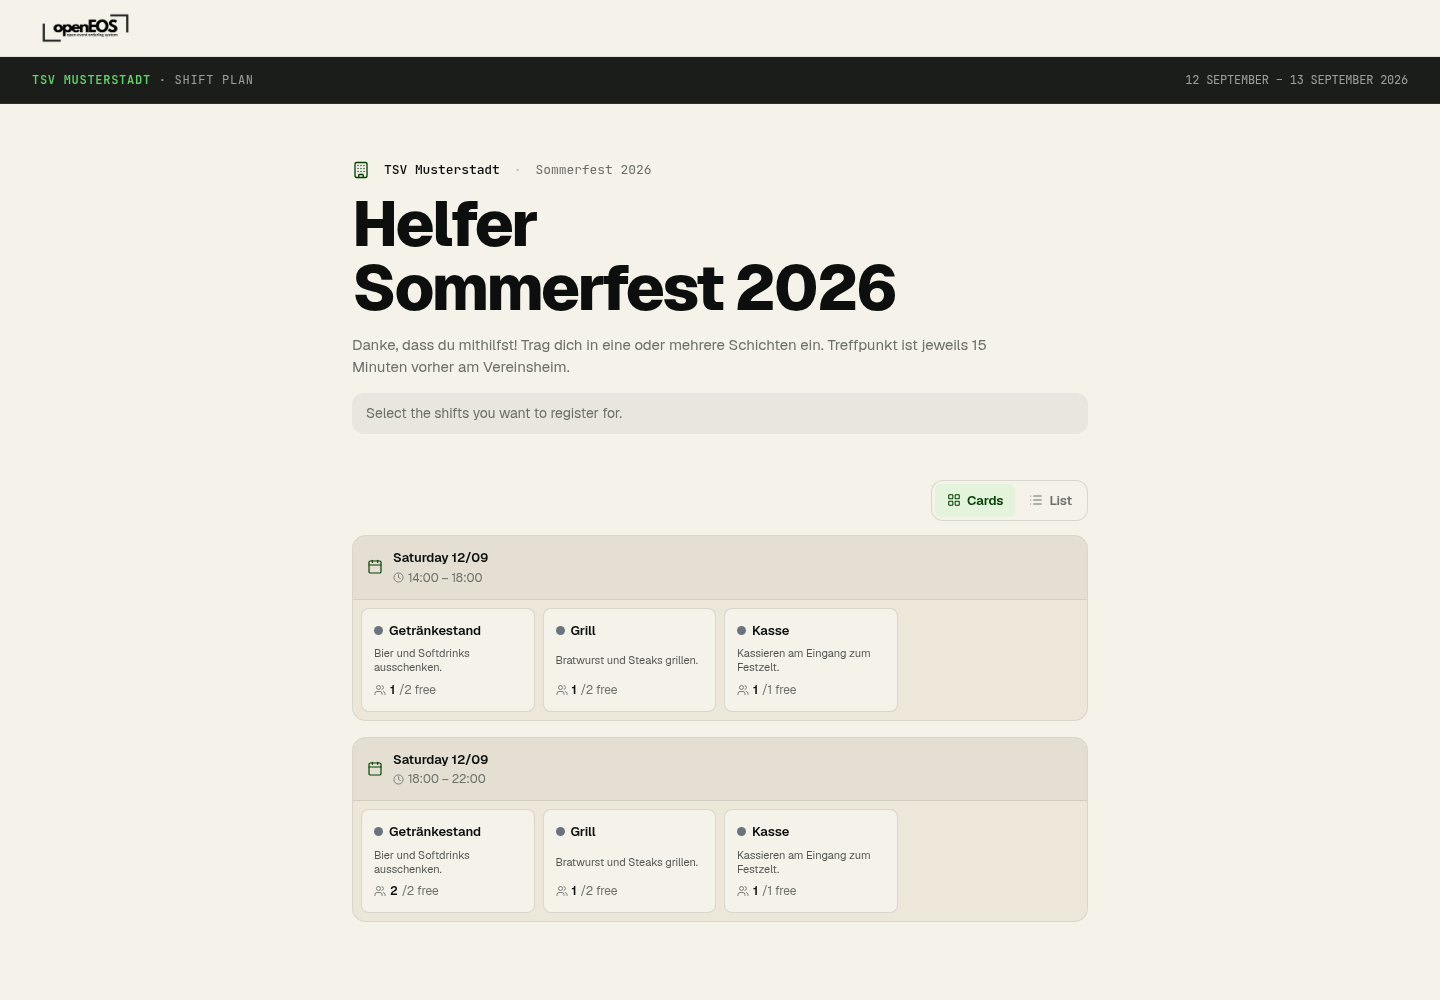
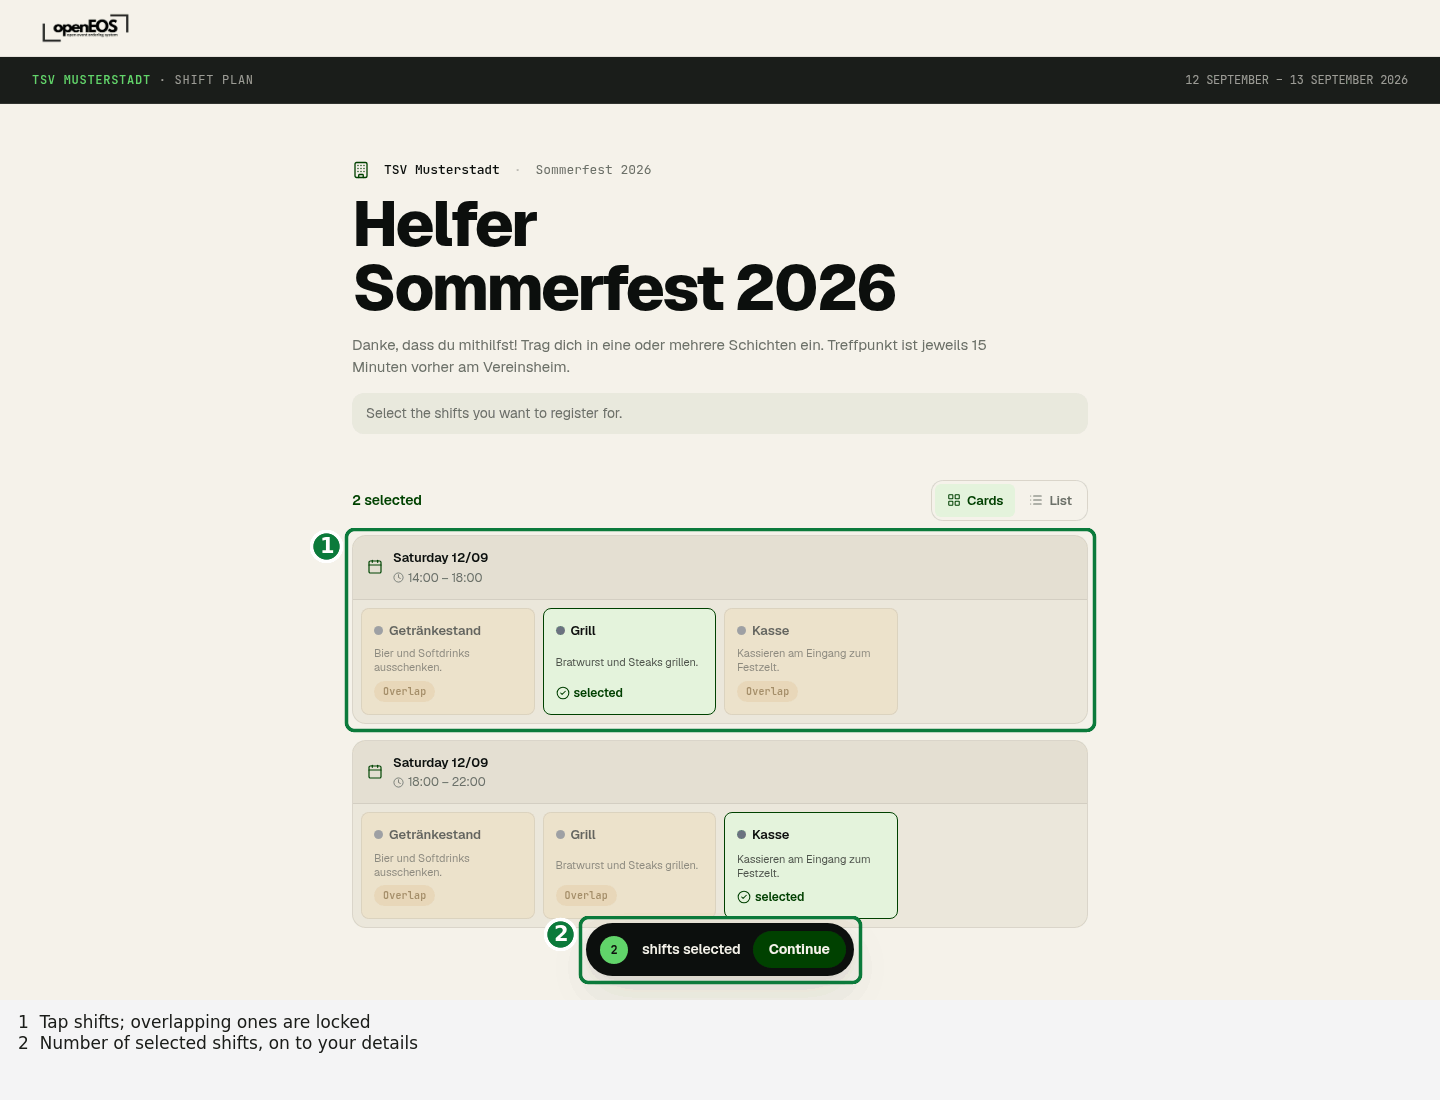
Helpers tap the shifts they want; shifts that overlap with a selected one are locked and marked Overlap. A bar at the bottom shows how many shifts are selected and leads on with Continue.
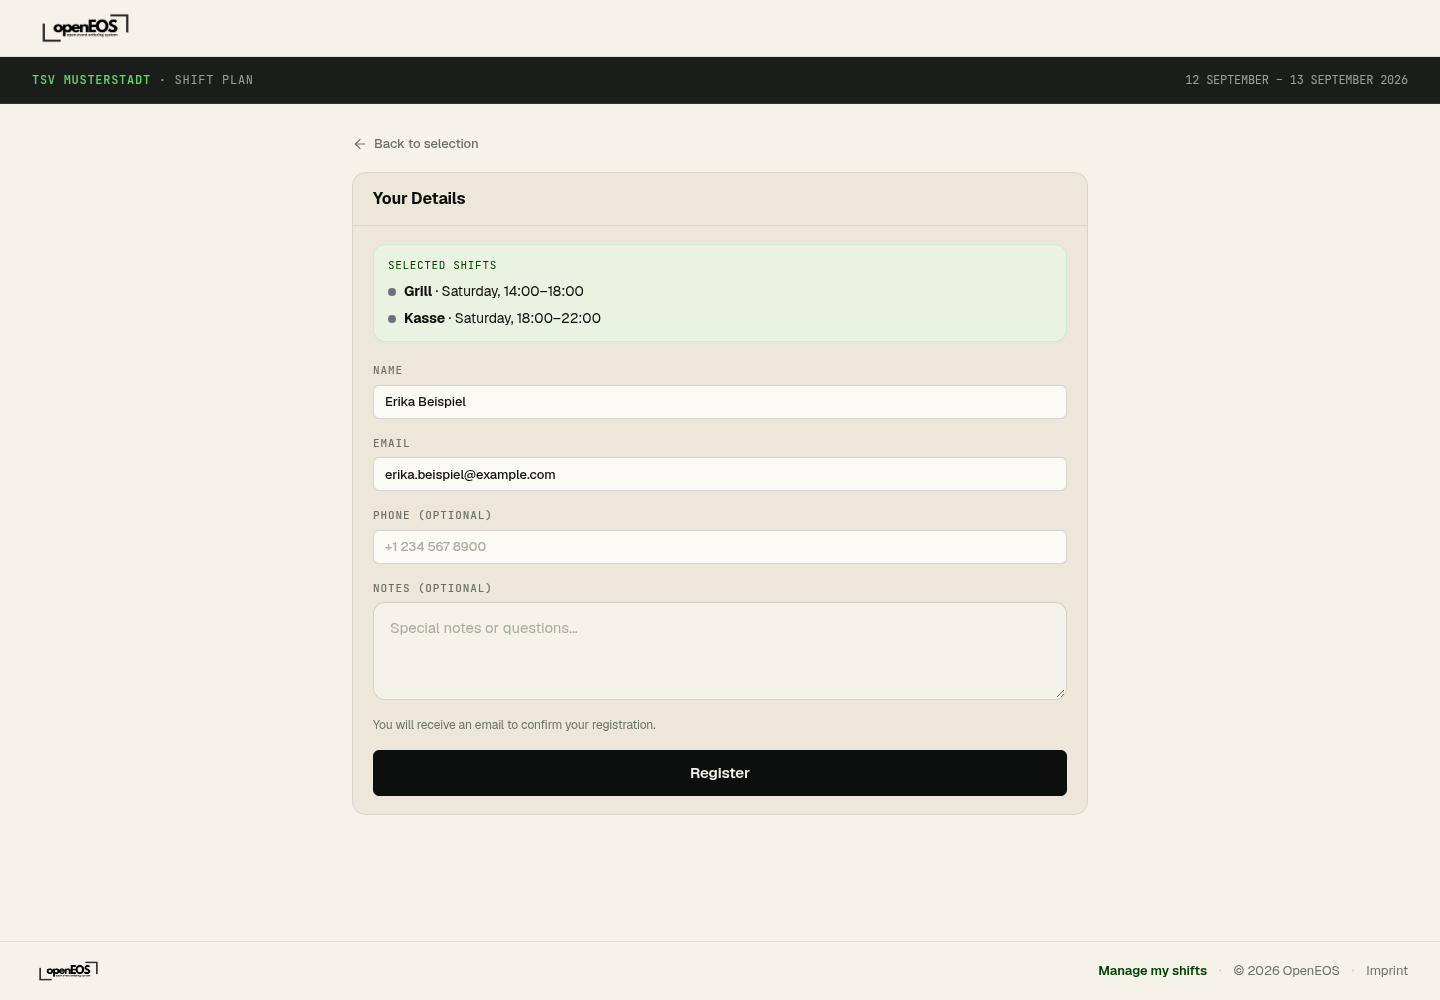
In the Your Details step the helper enters their name and email (and optionally phone and notes) and clicks Register. They then receive an email and confirm their address in it — only then does the registration count. Via Manage my shifts at the bottom of the page, helpers can later request a link to view and adjust their shifts.
Managing registrations
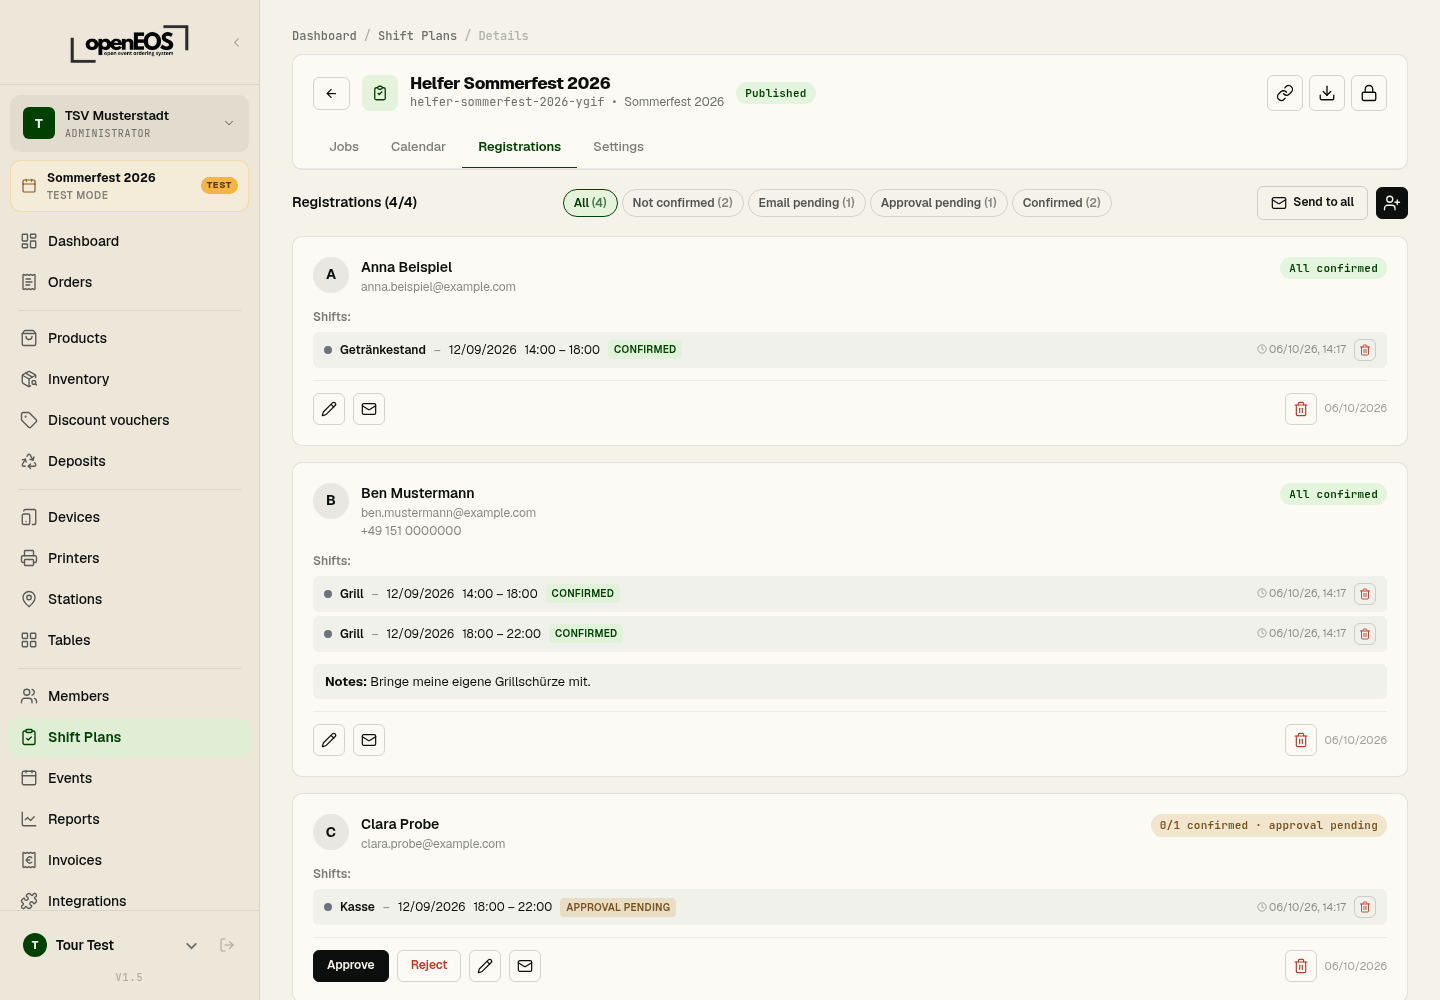
The Registrations tab shows all incoming registrations, each helper with their shifts and a status:
- Email pending – the helper has not confirmed their address yet. The tick (Mark as verified) skips this, for example if you know them personally.
- Approval pending – only with Require Approval: decide with Approve or Reject.
- Confirmed – all done.
The filters at the top narrow the list. Send to all emails all helpers; each registration also offers Edit, Send Message and Delete. Add helper manually at the top right lets you sign someone up yourself — even without an email address.
Create and publish the shift plan in good time and share the public link (e.g. via messenger or email) so that enough helpers sign up. Using permissions you can give a shift supervisor access to the Shift Plans module only.