Products
Under Products you manage the range of items for your active event — everything that is sold at the till. Every product requires at least a name and a price, and can be assigned to a category.
Products always belong to an event. If no event is active, the notice "No active event" appears. Activate an event first.
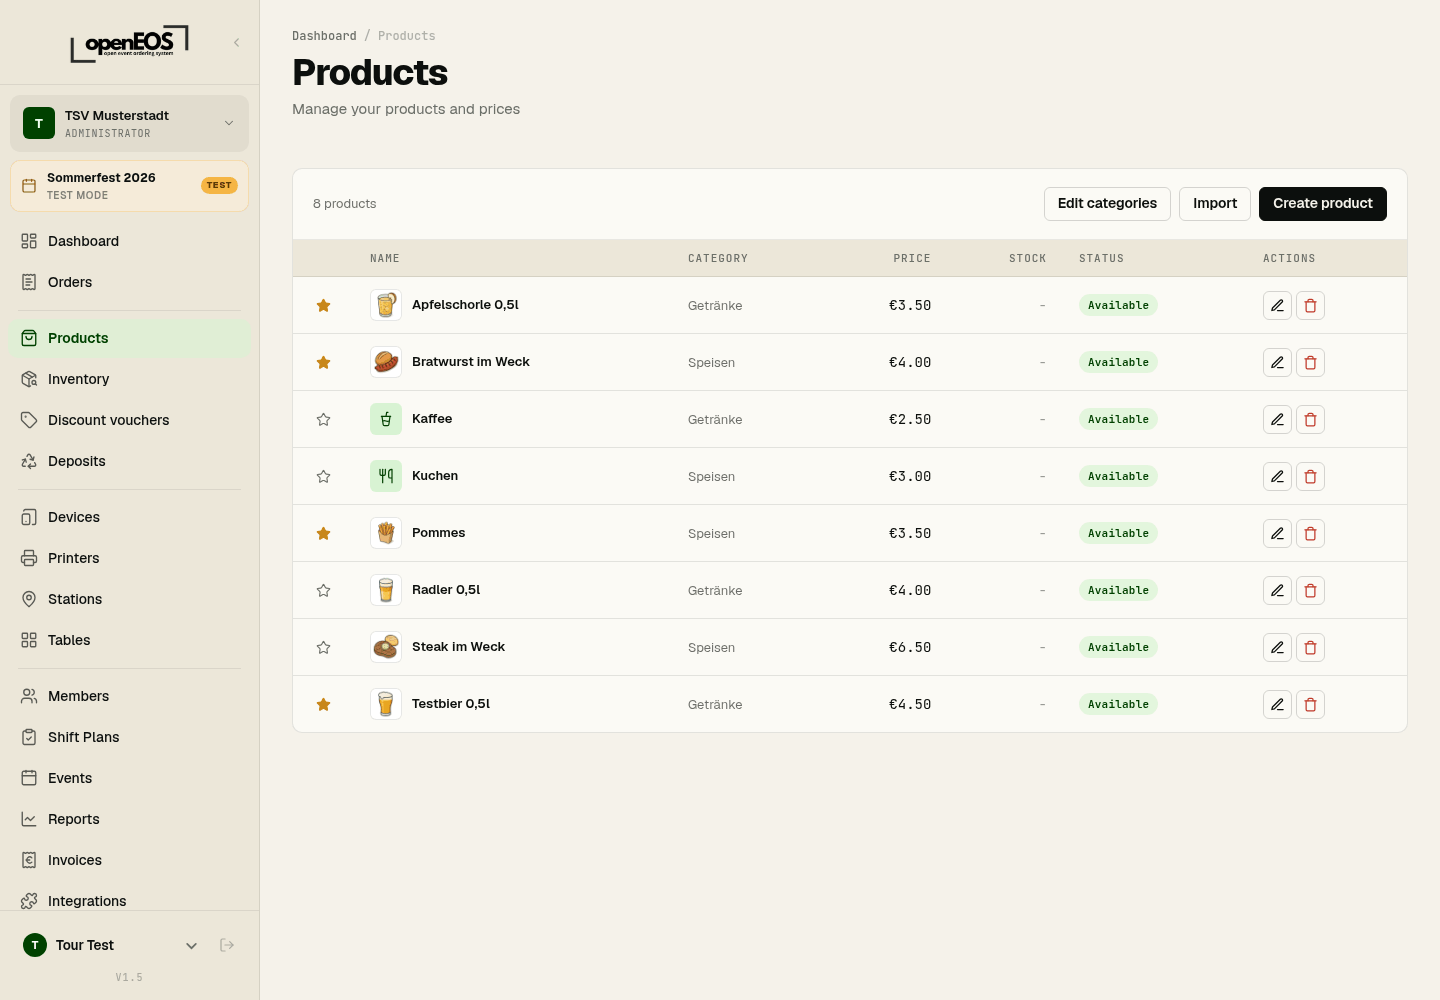
Creating a product
- Click Create product.
- Fill in the fields:
- Name (required)
- Category — assign the product to a category
- Description — optional additional text (e.g. "Freshly tapped")
- Price (required)
- Optional: choose a product icon or upload an image (see Icons and images).
- Optional: switch on Favorite so the product sits at the top of the till (see Favorites).
- Optional: use + Add group to add option groups (e.g. "Side dish" with selectable options).
- Click Create.
Product list
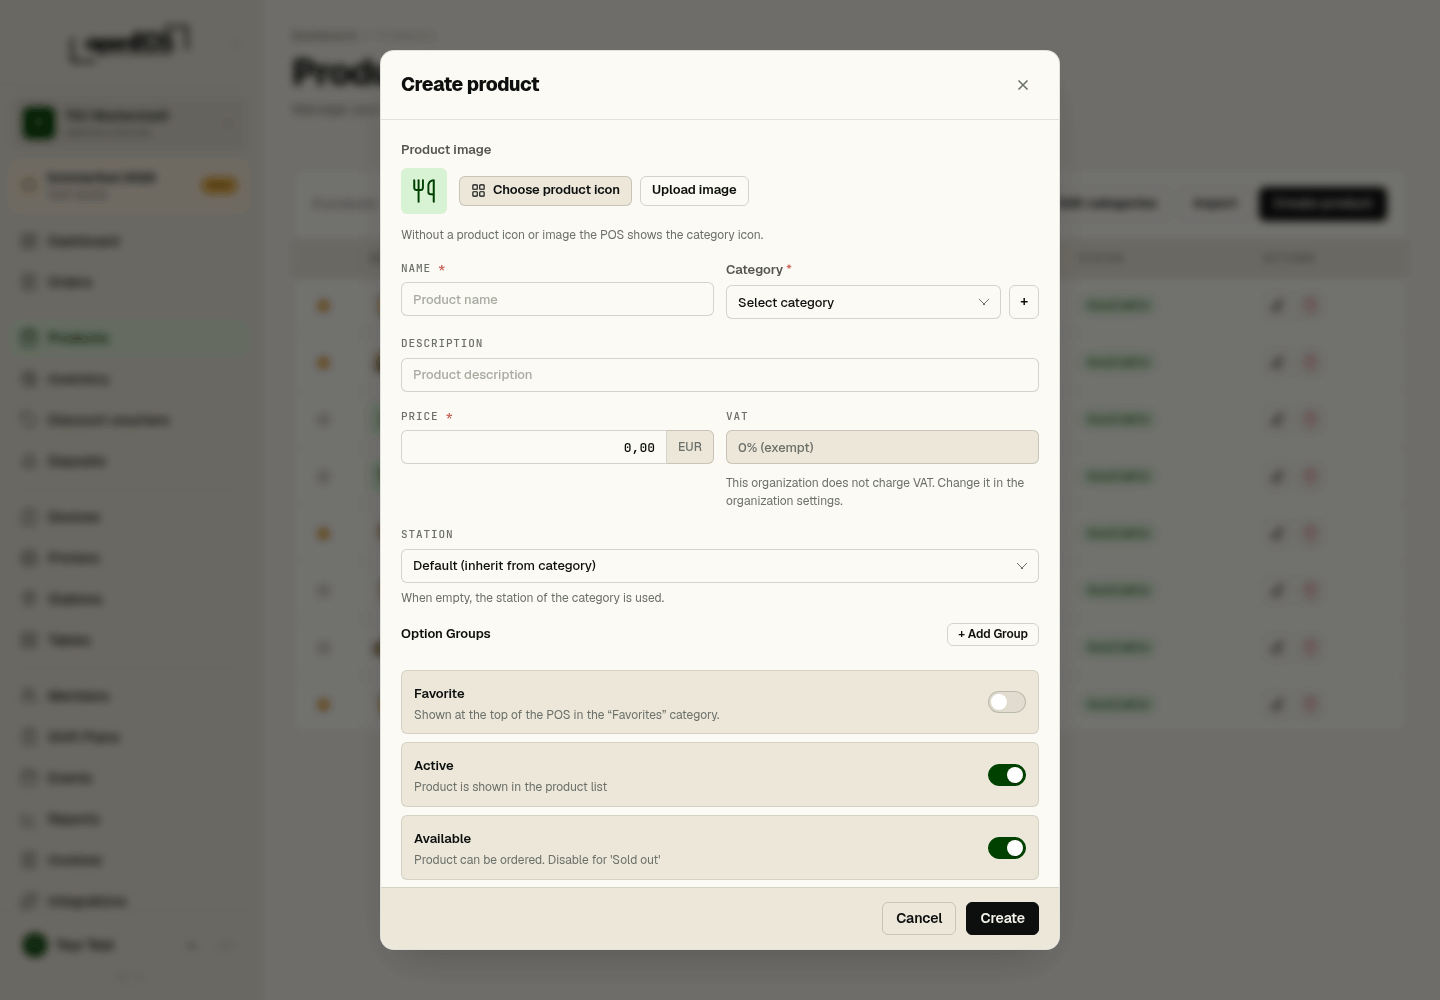
The table shows the Name, Category, Price, Stock, and Status (e.g. Available) for each product. Use the action buttons at the end of each row to edit or delete a product. The star in the row makes a product a favorite or removes it again.
Favorites
Mark what sells most as a Favorite — with the star in the product list or the Favorite switch in the product dialog. At the top of the till a Favorites category then appears with exactly these products; it is selected when the till is first opened. That way beer, bratwurst and fries are one tap away, whatever category they are in.
Without any favorites the category is not shown and the till starts with the first category. Favorites apply to all tills of the event.
Icons and images
At the till every product has a small picture on its tile. There are two ways to set it:
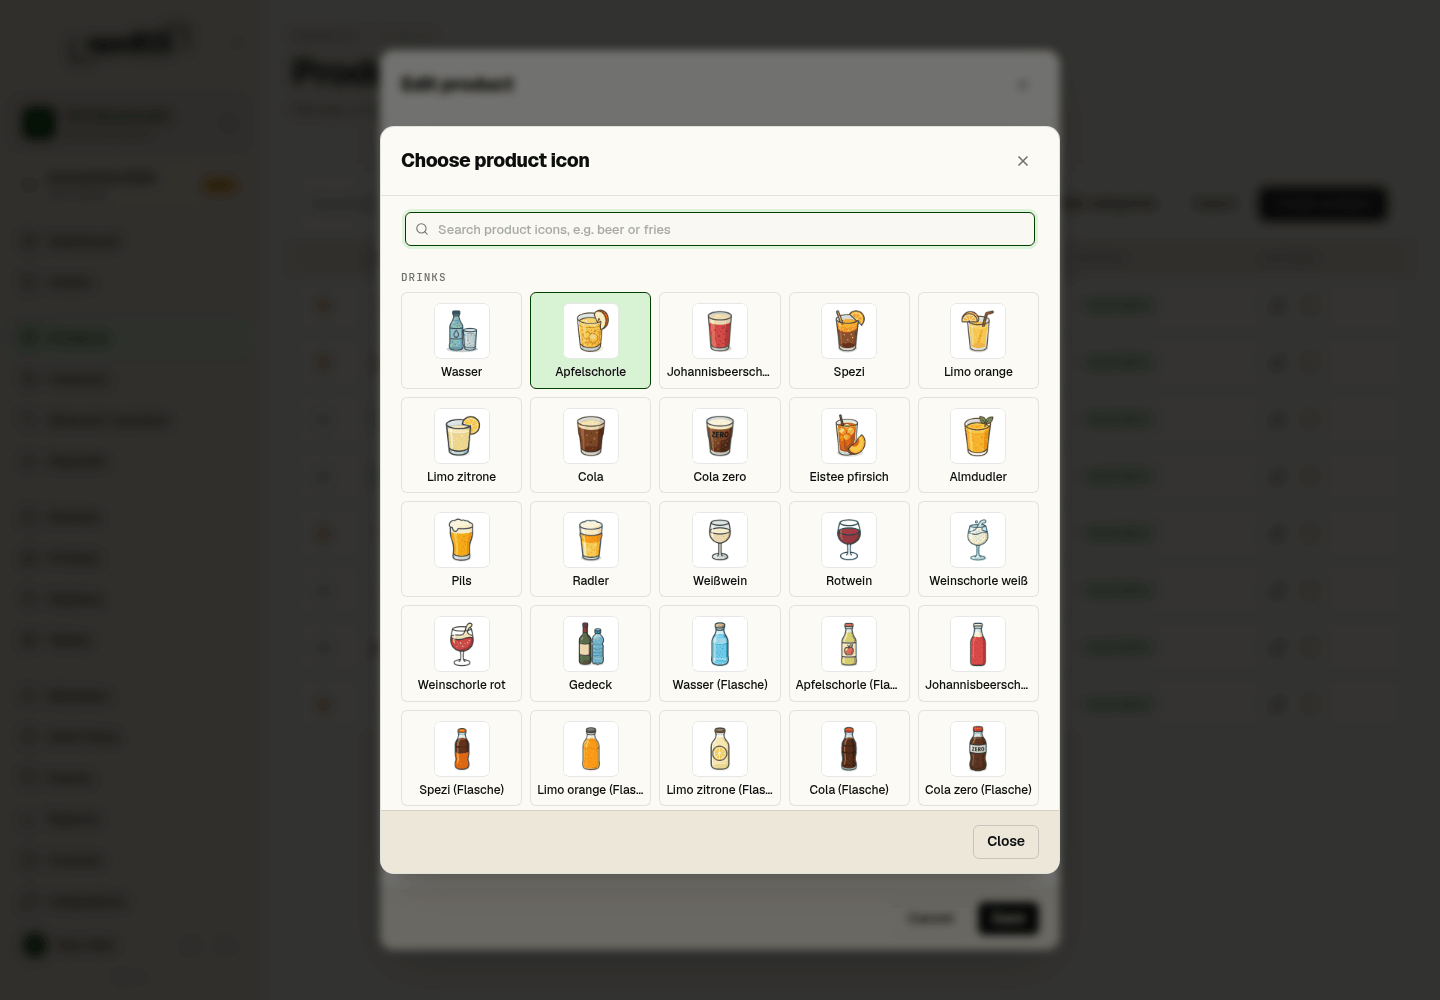
- Choose product icon — opens the picker with coloured product pictures: beer, shandy, wine and spritzers, soft drinks as glass or bottle, sausage, steak, burgers, fries, crêpes and more. Without a search they are grouped into drinks and food; the search finds them by English or German terms, for example "beer", "bratwurst" or "Pommes".
- Upload image — a photo of the product. It fills the icon area.
If a product has both, the till shows the product icon. If it has neither, it uses the icon of its category — for coffee or cake, say, which have no product picture of their own. Products that still carry an icon from the previous version are shown with the matching product picture (beer as a glass of lager, bratwurst as a grilled sausage in a roll) or, if there is none, with the category icon.
For the second line of the tile the till uses the first line of the description — write "0.5 l" or "in a bun" there, for example.
Stock tracking
The Stock column shows how many units of a product the system considers still available. This lets till staff spot early when a product is running low.
How stock tracking works:
- Sales reduce stock. When a product is sold at the till, its stock automatically decreases by the quantity sold.
- No stock set (
-). If the column shows a dash, no stock is tracked for that product — it stays sellable regardless of quantity. This makes sense for items without a meaningful unit count (e.g. freshly prepared food). - Status. The status (e.g. Available) indicates whether a product is currently offered at the till.
Connection with stocktaking
You record the opening stock and any later corrections in the Inventory module:
- Record opening stock – create a stocktake before the event and enter the available quantities per product. This value then appears in the Stock column.
- During operations – while sales are being made, OpenEOS subtracts the sold quantities from the stock. You always see the calculated remaining stock.
- Closing stocktake – after the event, record the stock that is actually left. The difference between expected and counted stock helps you understand consumption and shrinkage.
Track stock primarily for products where the unit count matters (e.g. crates of drinks, deposit cups). For freely prepared food you can skip stock tracking by simply not recording an opening stock.
Importing products
Instead of creating each product individually, you can use Import to load multiple products at once via a CSV file. In the import dialogue you map the columns of your file to the OpenEOS fields (name, price, category, etc.) and see a preview before the import is executed.