Devices (Tills)
Devices are the smartphones and tablets you register to use as a till (POS). OpenEOS requires no special hardware — any modern device with a browser can become a mobile till. Devices belong to the organization and are therefore available for all events.
You can reach this section via Devices in the sidebar.
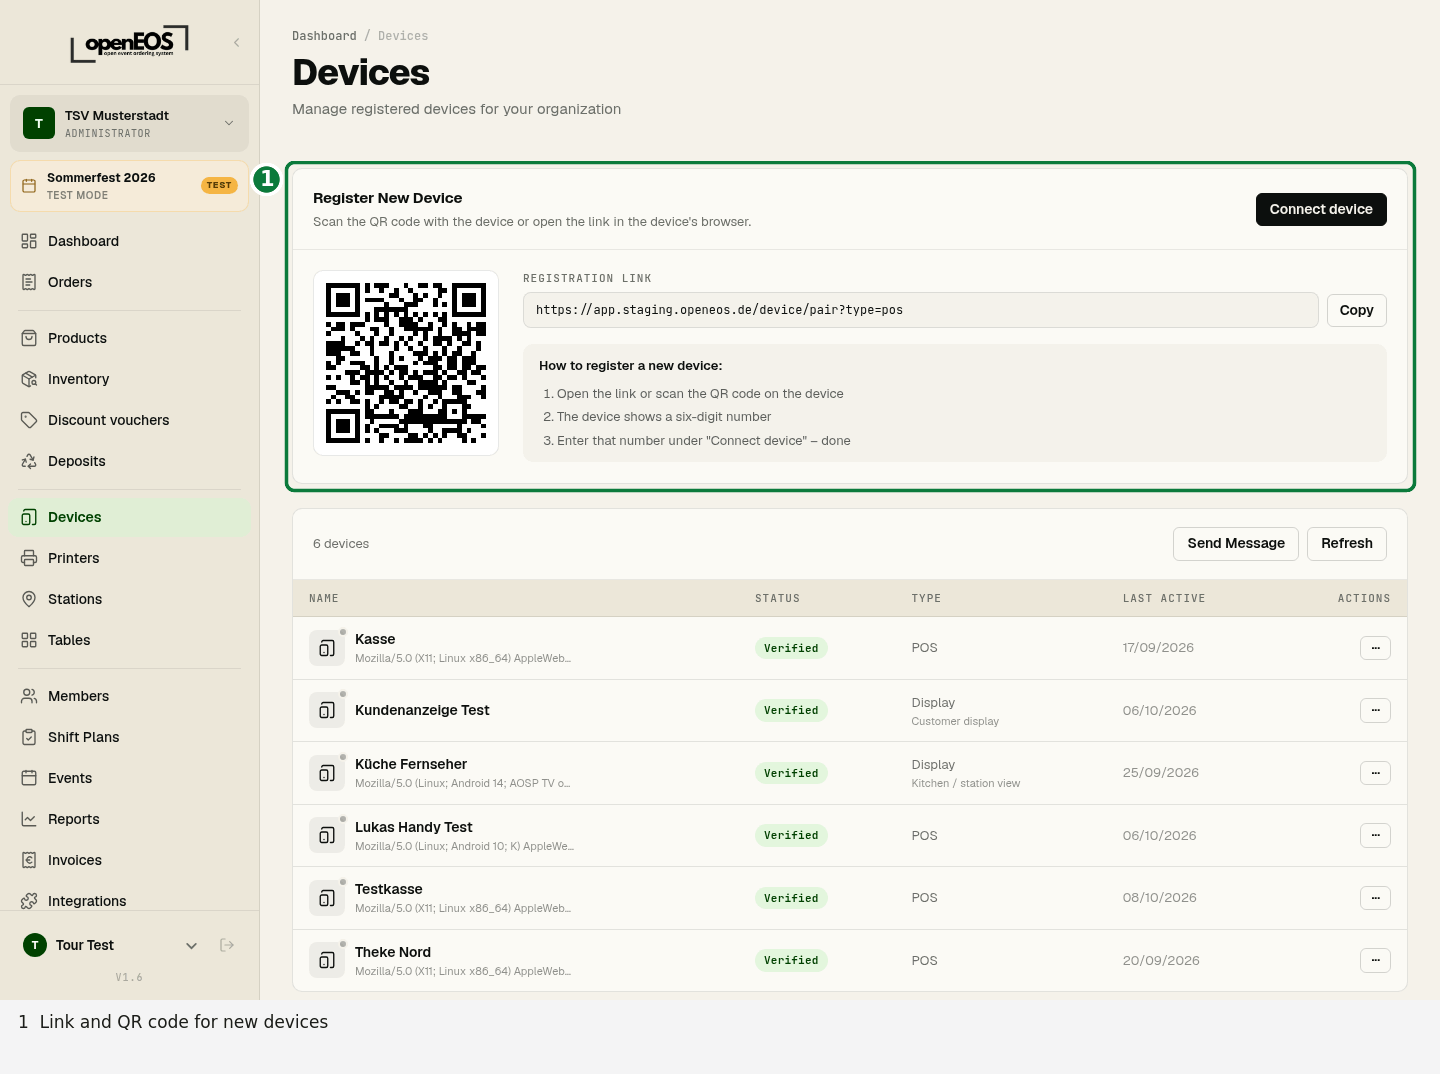
Connecting a new device
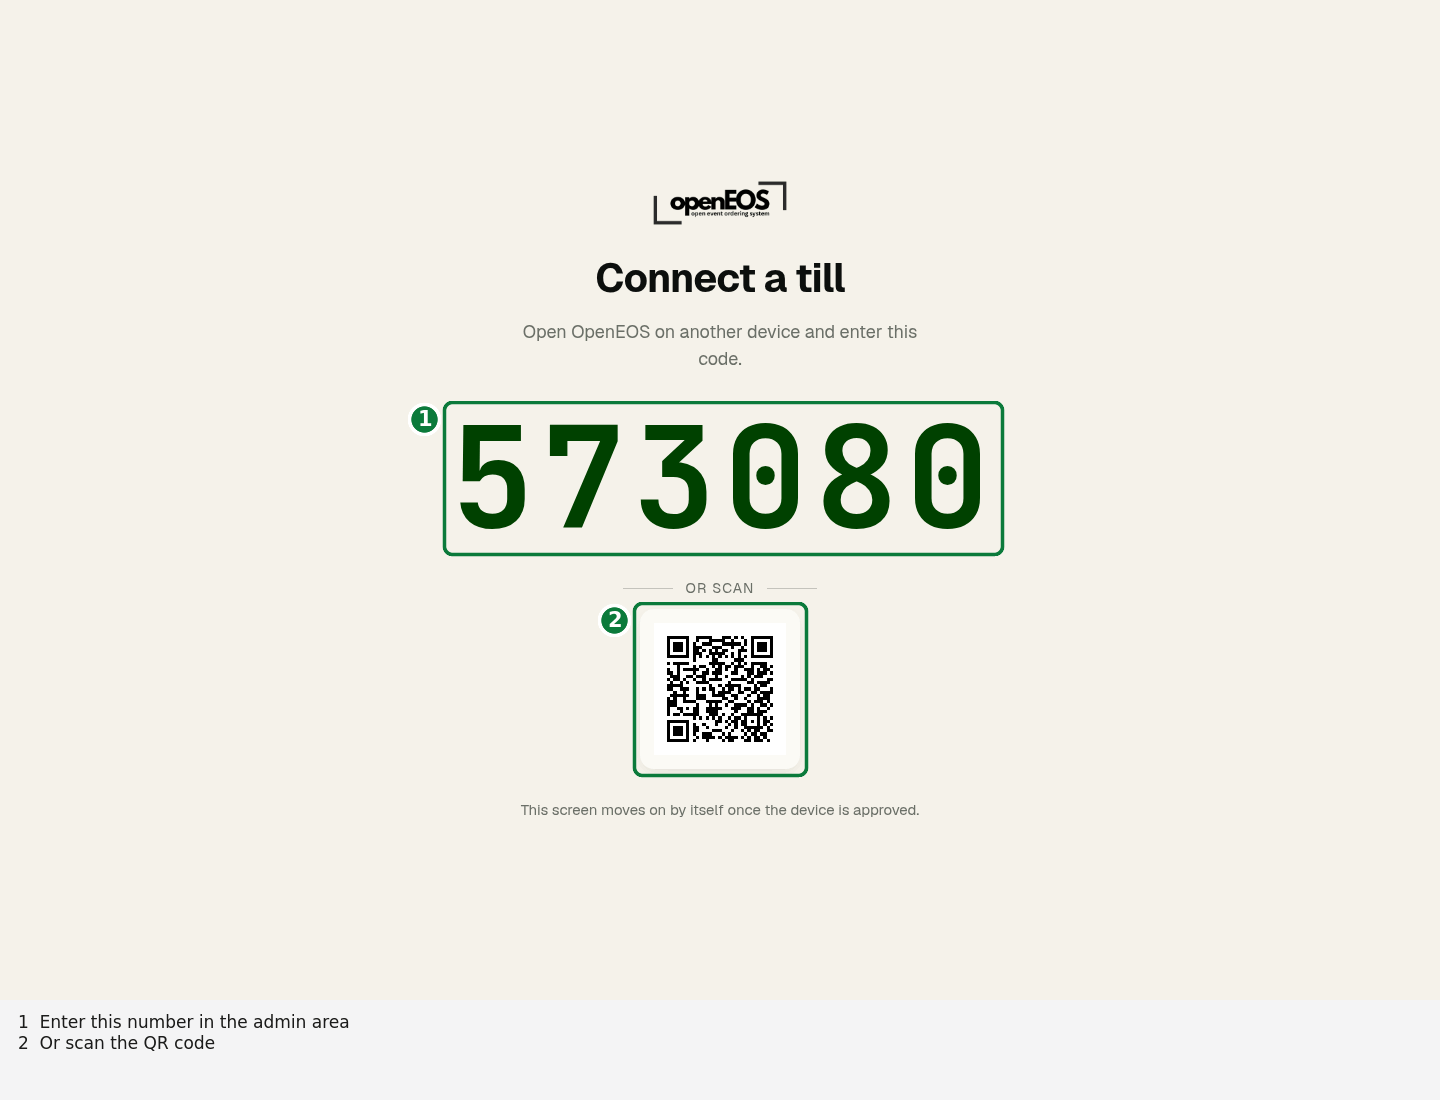
The device shows a number and you link it from your account. On the device itself you need neither credentials nor your organization's short name.
- On the device, open
app.openeos.deand choose Use as device (till terminal) at the bottom — for a screen, Use as display (monitor) instead. - The device shows a six-digit number in one piece (such as
573080), with a QR code beneath it as a second route. - In the admin area, go to Devices, click Connect device in the Register New Device card and enter the number. You can also paste it, from a message for example: OpenEOS ignores spaces and dashes.
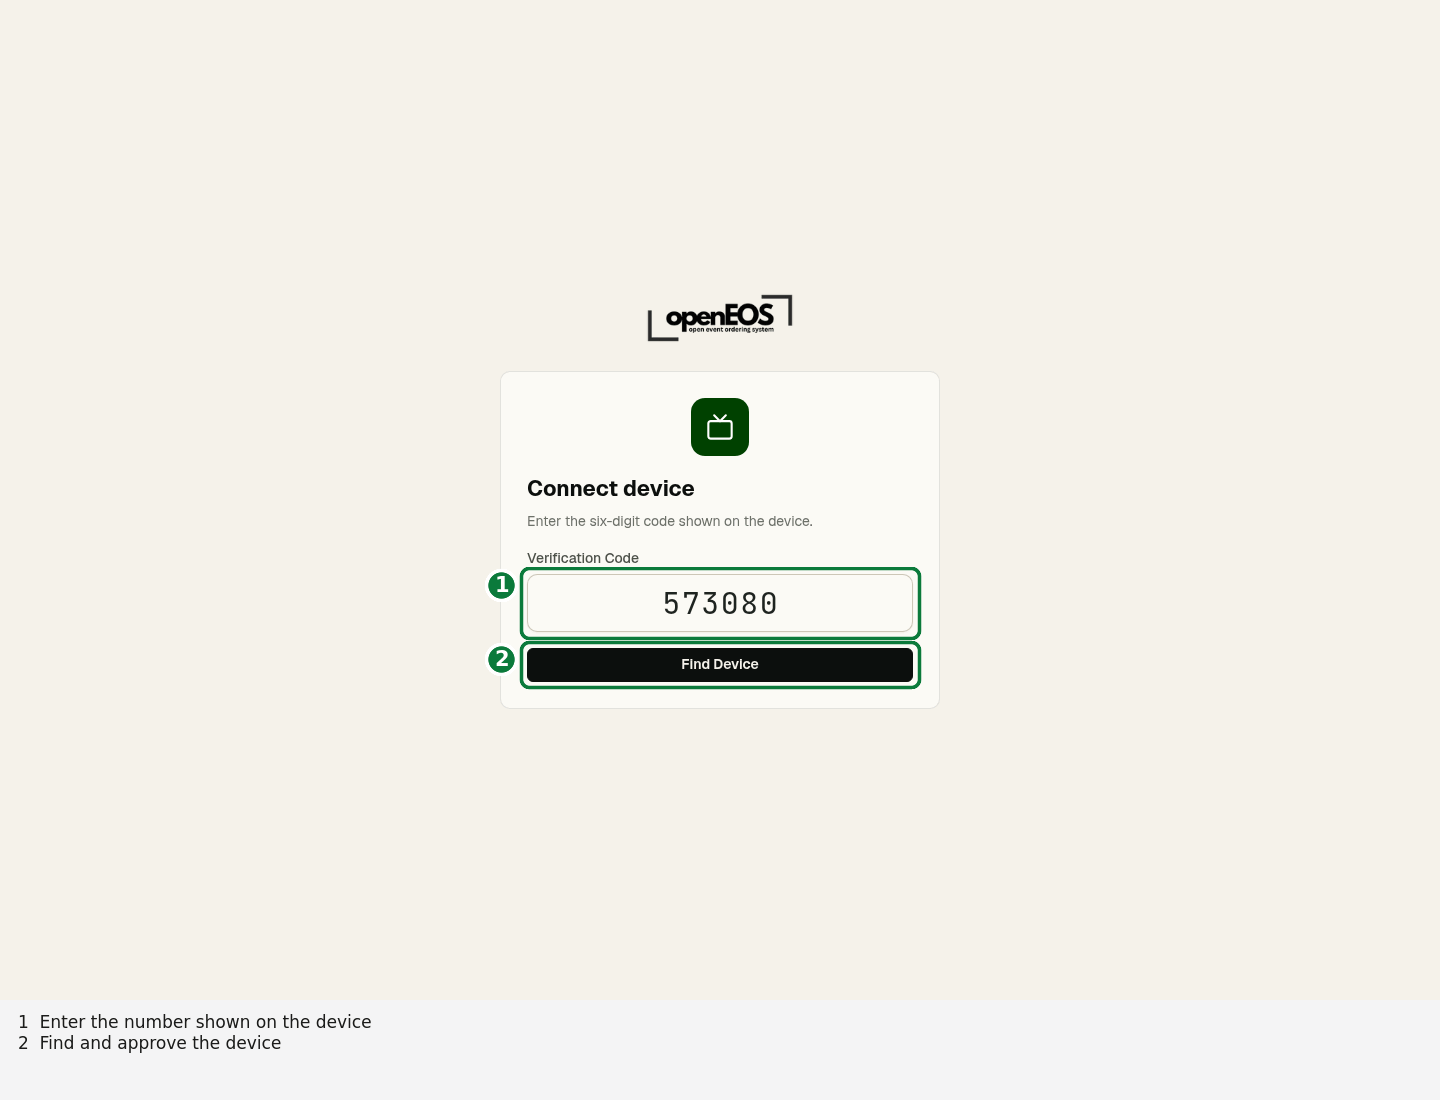 With a phone, scan the QR code instead — it opens the entry form directly.
4. Give it a name ("Bar till 1", say) and choose the device type.
With a phone, scan the QR code instead — it opens the entry form directly.
4. Give it a name ("Bar till 1", say) and choose the device type.
The device then switches into the till or screen by itself.
Nobody at a tablet has the organization's short name to hand, and a TV rarely has a keyboard. A six-digit number can be read out and typed in — nothing more is needed.
Managing devices
Registered devices appear in the list on the Devices page. Here you can keep track of which tills are connected to your organization and remove devices if needed.
A device only becomes a till once you approve it using the displayed code. This prevents unauthorised devices from recording orders.
Clicking a device opens its page. At the top you see its name, status (Online/Offline) and, on the right, Block and Delete; below are the tabs Overview, Settings and — for tills — Printer.
Overview
The tiles at the top of the Overview show at a glance what the device is set up for:
- Till — Operation (Table Service or Counter); with table service, the default area and table selection below it, such as "Area Tent A · Table selection: Map". Next to it, the device's orders, payments and revenue.
- Customer display — Linked to: the till whose cart the display mirrors.
- Station display — Station: which station the screen shows.
If nothing is assigned yet, the tile says "not assigned", with the link Set it in the settings below.
Settings
Under Settings the options are grouped by topic. Anything that depends on a choice sits right below it and only appears once that choice is made. Save applies everything; a till or display picks up the change immediately, without reloading.
- General — Name and Device type (till or display). The type decides which groups appear below.
Till settings
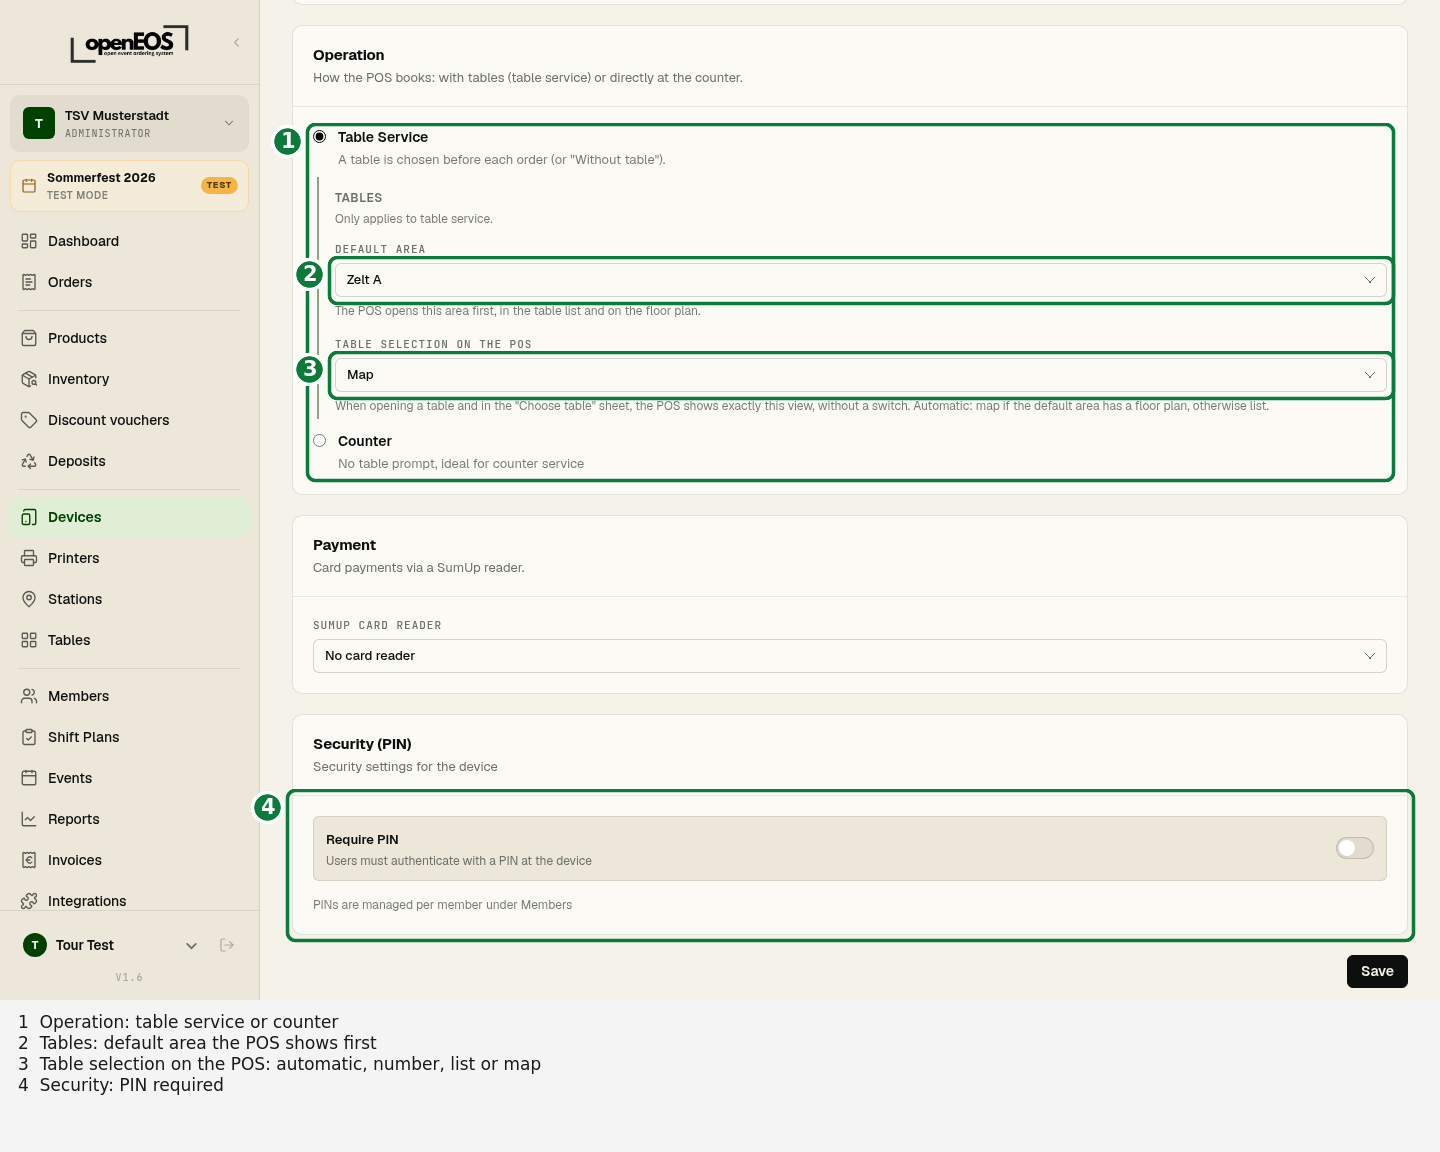
| Group | What you set |
|---|---|
| Operation | Table Service or Counter; with table service, Tables below it with default area and table selection |
| Payment | this till's SumUp card reader (once SumUp is set up) |
| Security (PIN) | Require PIN |
Operation
- Table Service — the till asks for the table before each order, as long as the event works with tables. For staff who go from table to table with a tablet or phone.
- Counter — no table prompt; everything is booked at the counter. For bars, food stalls and drinks counters.
Whether a table is actually requested also depends on the table mode of the event. The overview is under Till.
Default area
With Table Service, the Tables block appears below the choice. There you give the till a default area, such as Tent A. The till then shows the area in its header ("Till 3 · Tent A") and opens it first in the table list and on the floor plan. Without a default area the areas appear in their normal order. You create areas under Tables.
Table selection on the POS
Also in the Tables block you choose how this till opens a table:
| Table selection | When opening a table and under "Choose table", the till shows … |
|---|---|
| Automatic | the map if the default area has a floor plan, otherwise the list |
| Enter number | the keypad |
| List | all tables as tiles, by area |
| Map | the floor plan (available once an area has a floor plan) |
There is no switch for this at the till: each till shows exactly its own view. That way staff in the tent can work with the map while the bar uses the keypad. If the event uses free table numbers, every till shows the keypad.
PIN and lock
With Require PIN, everyone has to sign in at the till with their own PIN. You manage the PINs (4 to 6 digits) per member under Members. The till then shows who is signed in at the top right, and the lock next to it locks the till without losing the cart — see Till.
Without a PIN, anyone holding the device can use the till.
Display settings
| Group | What you set |
|---|---|
| Display | the Display mode and, below it, what belongs to it |
| Appearance & content | colour scheme, text size, header, idle message, logo |
Under Display you choose the Display mode:
- Customer display — a tablet facing the guest that mirrors a till's cart live. Below it you choose the POS device; items, quantities and totals then appear in real time as they are entered at the till.
- Station display — shows the orders of a station, such as the kitchen or the pickup counter. Below it you choose the Station from the active event and, with Clear completed, when finished orders disappear.
Newly registered displays start as a customer display. More on both kinds and on Appearance & content is in Setting up screens.
From till to order
Once a device is approved and an event is active, the till displays the products for the active event. Orders taken appear in real time under Orders and — if configured — at the assigned stations and printers.